


Before installing an exhaust manifold upgrade kit, thoroughly prepare: clean engine bay, verify compatibility & gather tools, inspect parts for damage and proper fitment. Unpack, disconnect old manifold precisely, install new one per manufacturer's instructions, then reattach components meticulously for a successful upgrade.
Upgrade your vehicle’s performance with a new exhaust manifold! This step-by-step guide will walk you through the proper installation process, ensuring optimal results. Before you begin, prepare your vehicle and gather all necessary components. Then, follow these detailed instructions: unpack and inspect each part carefully. The article covers everything from connecting gaskets to final adjustments, making your exhaust manifold upgrade a seamless DIY project.
Prepare Your Vehicle for Installation
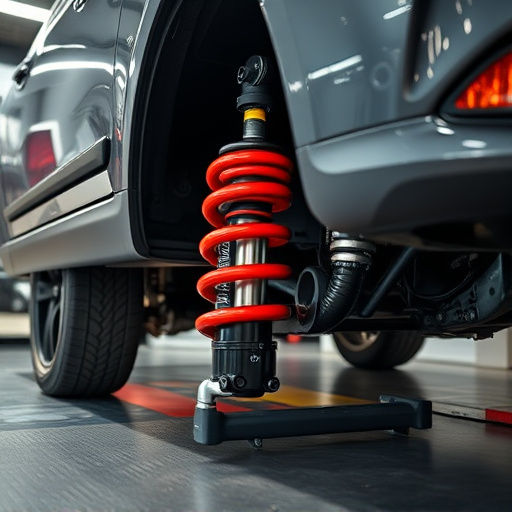
Before beginning the installation process, it’s crucial to prepare your vehicle for the upgrade. This involves ensuring that your engine bay is clean and free from debris or any objects that might interfere with the new exhaust manifold. Remove any protective covers or shielding around the area to gain full access. Double-check compatibility with your vehicle’s make and model, especially when dealing with high-performance parts like a performance exhaust system. Proper preparation includes verifying that all necessary components and tools are on hand, including gaskets, bolts, and wrenches specific to your upgrade kit.
Additionally, consider the impact of the exhaust manifold upgrade on other systems in your vehicle. The installation process may require adjustments to air intake systems or even modifications to ensure optimal performance and efficiency. A thorough inspection before starting ensures a smoother upgrade process and enhances overall engine health, especially with such significant modifications.
Unpack and Inspect Components
Before beginning the installation process, carefully unpack all components of your exhaust manifold upgrade kit. This step is crucial to ensure that you have everything required and that none of the parts are damaged during transit. Once unboxed, thoroughly inspect each piece for any signs of wear, dents, or cracks. Verify that all bolts, nuts, and gaskets are present and in good condition. Check that the fitment instructions provided by the manufacturer align with your vehicle model and year.
Taking the time to properly inspect your upgrade kit guarantees a seamless installation process. It also allows you to identify any potential issues early on, ensuring optimal performance from your new exhaust manifold. Remember, high-performance parts like exhaust tips and performance brakes rely on precise assembly for maximum efficiency, so pay close attention to each component’s condition before proceeding with the upgrade.
Step-by-Step Upgrade Process
Upgrading your exhaust manifold is a project that requires precision and attention to detail. Here’s a step-by-step guide to ensure a smooth process:
1. Prepare Your Workspace: Park your vehicle on a level surface and engage the parking brake. Gather all necessary tools, including your new exhaust manifold, wrenches, sockets, and safety gear. Ensure ample space around the vehicle for ease of work.
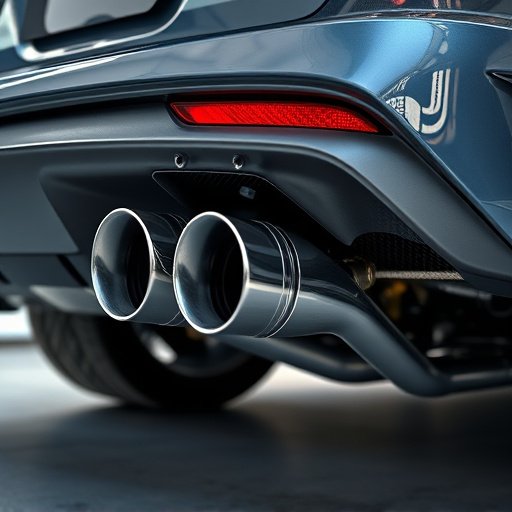
2. Disconnect Existing Components: Start by removing the old exhaust manifold using the appropriate tools. This involves unbolting or unwiring several components such as sensors, hangers, and the muffler tips. Be sure to note the position of each component for proper reinstallation later. Safety first! Wear protective gloves and glasses during this process to avoid any accidents.
3. Install New Manifold: Position the new exhaust manifold carefully, ensuring it aligns with the vehicle’s specifications. Secure it in place using the provided hardware, tightening it according to the manufacturer’s recommended torque specifications. Remember, a tight fit is crucial for optimal performance and to prevent leaks.
4. Reattach Components: Once the new manifold is securely in place, reattach all disconnected parts, including sensors, hangers, and muffler tips. Ensure all suspension components are properly aligned and that brake pads are not compromised during the upgrade. Double-check your work before starting the engine.
Upgrading your exhaust manifold is a great way to enhance your vehicle’s performance, but it requires careful preparation and attention to detail. By following these steps, from packing and inspection to installation, you’ll ensure a smooth process. Remember, proper installation is key to maximizing the benefits of an exhaust manifold upgrade, so take your time and refer to manufacturer guidelines when needed. With the right approach, you’ll be on your way to a more efficient and powerful ride.